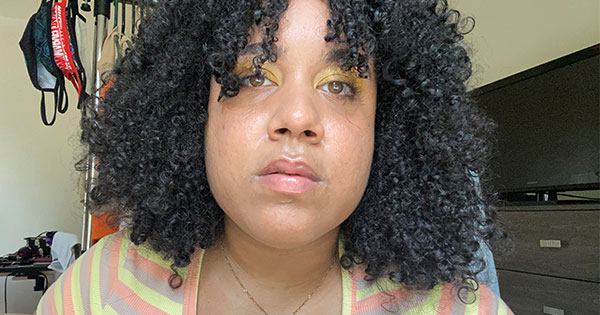
After the wash and deep conditioner, I was onto the big change of the day: the shape cut. Trims are one thing but a shape cut is a whole different ball game. It provides the volume and shape my curls were missing. When I sat down and met my stylist, Christina, I knew I was in good hands. She took special care to detangle my hair even more and worked her magic in creating the shape that I always admired on other curly gals.
The big takeaways:
- When doing a big cut, provide a reference picture to your stylist. The best thing you can do is have a clear vision of what you want your hair to look like. Instagram and Pinterest are great tools for finding inspiration. The key (and the secret to not getting overwhelmed) is to find pictures that match your hair type and texture. The last thing you want is to create high expectations for a look that works on 2A type hair when you have a 4A texture. I ended up showing the post above (and two more) to my stylist to let her know what I wanted.
Once she finished with trimming, it was onto styling. She spent time going through the steps while answering every question I had (and I had a ton of questions). But Christina was patient and informative. She never once made me feel like my questions were common sense—even after I told her that I was a beauty writer. She definitely blew my mind with some of her tips and made me realize that my routine needed some refining.
The big takeaways:
- Have you heard of the LOC method? Well, technically it should be LCO (aka leave-in conditioner, cream and then an oil). My stylist mentioned that hair oil locks in moisture, so you don’t want to add that in the middle of your routine.
- She also emphasized that all of your products should be focused on your strands (especially your ends) and as far away from the scalp as possible. Your scalp already has natural oils, so the last thing you want to do is cause product buildup (which can lead to irritation and flaking).
- Since I have low porosity hair, my locks tend to dry up fast. She recommended investing in a mist spray bottle and spray water onto each section in-between styling. This will keep my hair damp and really let the products absorb, while minimizing frizz.
- There’s a big debate between using your fingers or a brush to define curls. Christina used both techniques in my hair and believes that it all depends on the individual and how defined you want your locks to be.
Finally, my hair was ready to be dried. She used both a diffuser and the dryer nozzle to dry my hair. After a good 45 minutes or so, we were done. But not before my curls were given the finger-coiling treatment, a good shake and a dramatic hair flip.
The big takeaways:
- After your curls are completely dry, apply a hair serum and start pulling apart large clusters of curls for more volume and definition. Christina spent extra time going through each of my curls, while focusing on areas that needed more love (aka some finger coiling, serum or water). The serum provided a boost of shine and protection against the heat.
- When it comes to drying your hair, it’s all about personal preference. When you air dry your curls, expect low volume, a longer dry time and a little more frizz. If you prefer to use a diffuser (or going under the dryer), expect more volume, quicker dry time and little to no frizz. The biggest difference is heat. Many curly gals (like myself) are not keen to using heat to style their hair, so it all depends on what you’re comfortable with.
